Adding Multi Choice Fields
A multi choice field contains a drop list enabling you to select one or more values to complete the field in the Document Grid View. Only values that appear in the drop list can be used to complete the field.
Multi choice fields and their choice values can be created and updated using the Field Setup dialog box.
Existing fields in the Document Grid View can be converted to a multi choice view.
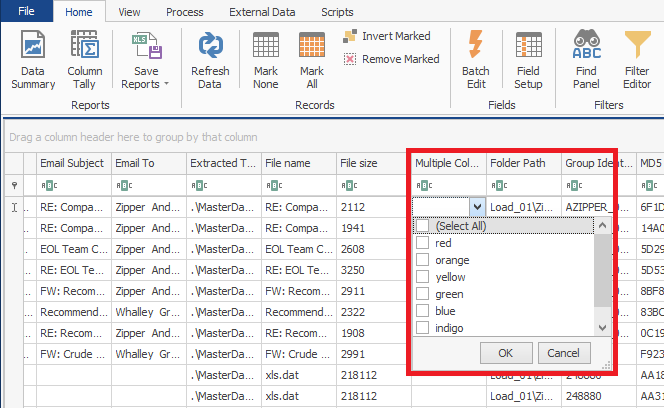
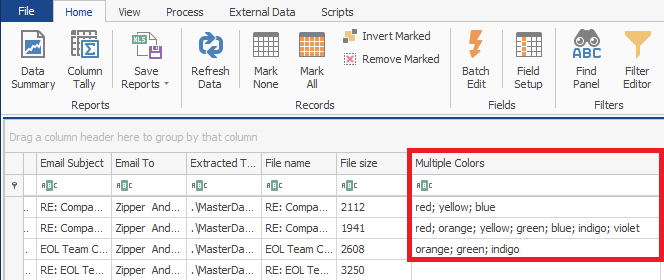
Multiple values appear in the field separated by a semi colon.
To add a choice field using Field Setup
- In the ReadySuite ribbon, click Home > Field Setup.
- On the Field Setup dialog box, click the drop arrow right of the Add Fields tab, select Multi Choice Fields.
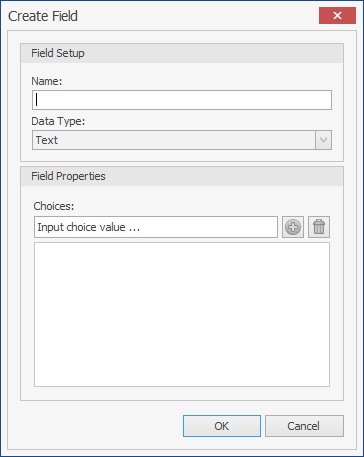
- On the Create Field dialog box, in the Field Setup section, enter the Name and select the Data Type.
- In the Field Properties section, enter the Choices for the new field. (Click the add icon
 to add additional choices. Click the delete icon
  to remove selected choice value from the available choices.)
 - Click Ok.
- View the new choice field in the Field Setup list.
- Close the Field Setup dialog box and view the new date field in the Document Grid View.
Note: The name appears in the column header of the choice field in the Document Grid View.
To update the options for a choice field
- Do one of the following:
- Right-click the choice field in the Document Grid View you want to edit and select Manage Choices.
- In the ReadySuite ribbon, click Home > Field Setup and select the choice field you want to edit.
- On the Field Setup menu, click Edit Field.
- On the Edit Field dialog box, update the choice field as necessary (example, add additional Choices to choice values).
- Click Ok.
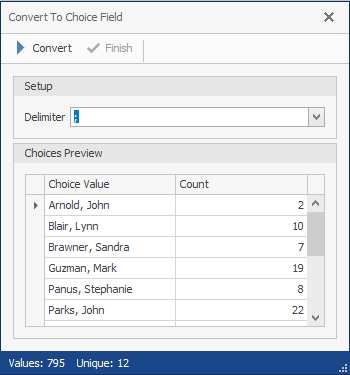
To convert a regular field to a multi choice field
- Right-click the header of the column with the fields in the Document Grid View you want to convert and select Convert To... > Multi Choice Field.
- In the Setup section, select the Delimiter, the character (colon or semicolon) that separates selected values within the cell on the Document Grid View .
- View the current values in the column in the Choices Preview table, as well as a tally of their occurrences. The Unique value in the footer is the number of choice values that will appear in the drop list when the field is converted.
- Click Convert, then click Finish.
- View the field as a multi choice field with the choice values available for selection in a drop list.