Exporting to Chat and Relativity Short Message Format (RSMF)
RSMF (Relativity Short Message Format) files are data from text messages, such as Apple iMessage or instant messenger services, such as Skype, Bloomberg, and Slack. The Chat Export wizard enables you to open existing RSMF files and create (as well as export from) new RSMF load files. Also, by using scripts in ReadySuite, you can create conversation sets, such as groups of like participants, and import data from unique data sources.
For more information about RSMF in Relativity, see:
IMPORTANT
For attachments to appear in the Relativity Short Message Viewer and to be associated with the correct parent messages, a field that is called Group Identifier whose Source is Group Identifier must be set up in Relativity. For more information, see:
To export an RSMF or HTML data set from ReadySuite to Relativity
- Import to ReadySuite the RSMF data set you want to export to Relativity.
- In the ReadySuite ribbon, click External Data and click Chat to open the Chat Export wizard.
- On the Export Setup page, specify the file export destination, format, and additional settings.
- Format: Seletct from the following:
RSMF 1.0-
RSMF 2.0 HTMLEML (per message)EML (batched)- Export Path: Location of exported files.
- Time Zone: The time zone of the source data set (such as the Timestamp).
- Attachments: Select to embed attachments into the RSMF. For HTML, only certain media (.mp3, .wav. and .ogg) and images (.png, .jpg. jpeg, and .gif) can be attached. These settings can be configured in the chat file.
- File Prefix: Enter a prefix for the output file if selecting an existing field (for example, Conversation Type) for use as the naming prefix for the batch. Any file created by ReadySuite will have this prefix at the start of the filename.
- Batch By: Select the field to create base groups of conversations the RSMF file.
- Split By: Select the category used to split files from the following:
- For HTML, select to split by Time and then choose to split by
Year,Month, orDay. - For RSMF, select to split from the following (you can select more than one):
- Platform: Source of the imported chat data (examples: Message, SMS, Microsoft Teams, Slack, Google).
- Converstation Type:
DirectorChannel. - Time:
Year,Month,Week,Day, orHour.
If you select with quiet period, select the length of the quiet period to set a threshold between periods of no messages being set when splitting a RSMF file. If a conversation is still occurring beyond the selected time split, but doesn't exceed the quiet period, it is still included in the original split.
- Chunk By: Select to control the total number of events included and maximum file size for any exported RSMF file.
- Saved Path: Select or create field that will be updated to include the full path to the exported load file.
- Click Next.
- If processing an RSMF file, on the Export Setup page, specify the export destination, format, and additional settings.
- Application : Select to populate the
X-RSMF-Applicationfield. (Per Relativity documentation, this is used to identify the source of the data, which is intended to be ambiguous. For example, it could be the application of the data contained in the RSMF file.) - Custodian: Select to populate the
X-RSMF-Custodianfield. (This field is used to identify from whom the data was collected from.) - Collection ID: Select to populate the
X-RSMF-EventCollectionIDfield. (Per Relativity documentation, this field should be a unique ID that is to be used to help keep many RSMFs from a single conversation together. The intent with this field is to allow for better sorting of RSMFs in a document list to group parent RSMFs to the same conversation, if conversations or RSMFs are broken up for review purposes prior to being put into Relativity.) - Conversation: Select any optional name/value objects to store additional metadata about the conversation.
- Participants: Select any optional name/value objects to store additional metadata about the participant.
- Events: Select any optional name/value objects to store additional metadata about the event.
- Click Next.
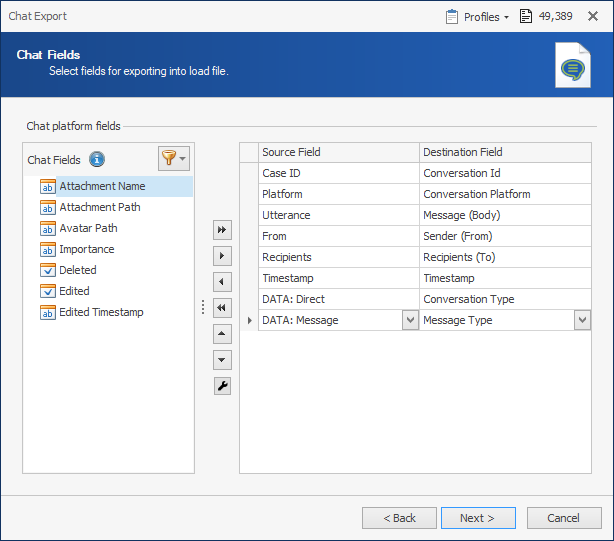
- On the Chat Fields page, select the fields for exporting into the export file. The Source Field is the data from the RSMF file. The Destination Field is the field that is populated in ReadySuite. (For more information, see Import Fields).
When selecting fields for Chat and RSMF files, there are several required and optional fields. The required fields are automatically populated when starting a new chat export. When adding fields from a Chat project to the field map, non-required field are automatically set to the desired RSMF Destination Field.
Most of the field requirements are documented in the RSMF specifications listed in the following image. - Click Next.
- On the Chat Participants page, preview and modify the participants for the load file. You can map Choice values to new Display names and provide an optional Email or Avatar Path for those participants.
- Email: The primary email address of the participant.
- Avatar Path: The name of a file within the RSMF.zip, including any image to display for the avatar of the participant.
- Click Next.
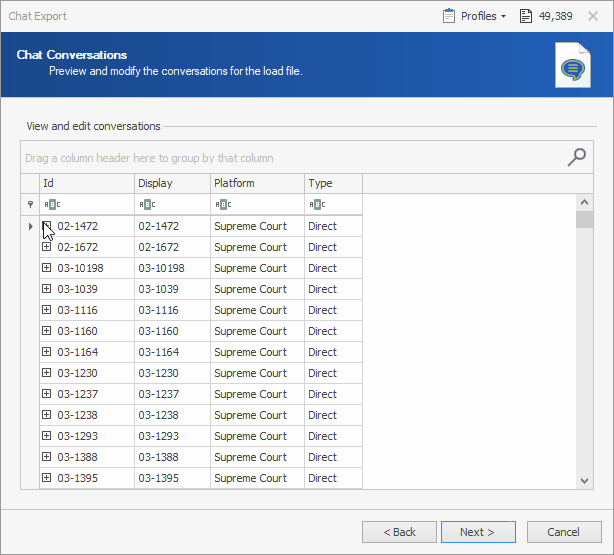
- On the Chat Conversations page, preview and modify the conversations for the load file. In the conversation preview, you’ll see a list of conversations along with the unique set of participants for each conversation. This data is based on the value set for the conversation Id field. You can edit the conversation Display values, Platform names, and conversation Types. These modified values will be saved to the created RSMF file.
- Click Next.
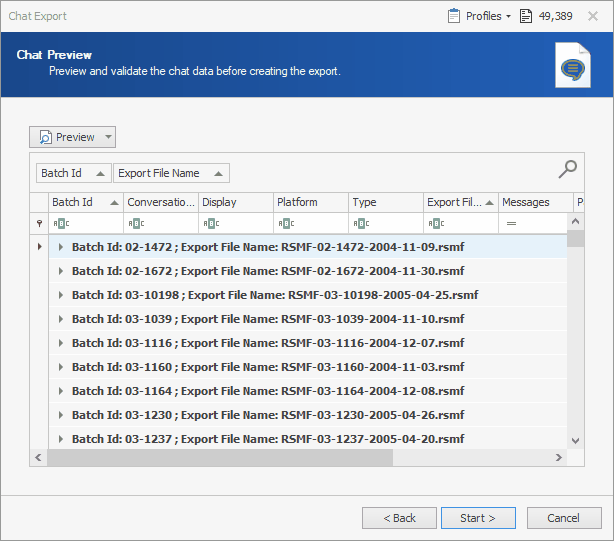
- On the Chat Preview page, preview and validate the chat data before creating the export. Here you can see the resulting filename for each RSMF file, the number of conversations in each file, message count, participant count, and the begin/end dates.
- To save the data in this Chat Preview page as an Excel report file, click Preview and select Save Report.
- To locate content on the Chat Preview page with a Find panel, click the magnifying glass icon
 .
. - Click Start.
- On the Import Progress page, view the details of the import process.
- Click Finish.
- Export folder (example:
RSMF Export) - Export format (example:
RSMF1orRSMF2)- If selected during export, Conversation split (example:
ChannelandDirect) - If selected during export, Platform split (example:
msteams) - If selected during export, Time split (example:
2023-04-01and2023-04-02)- Conversation Id (example:
ed736629-491f-4cce-9e0b-3b114d0b3efd_1_1-1332.rsmf)
- Conversation Id (example:
- If selected during export, Conversation split (example:
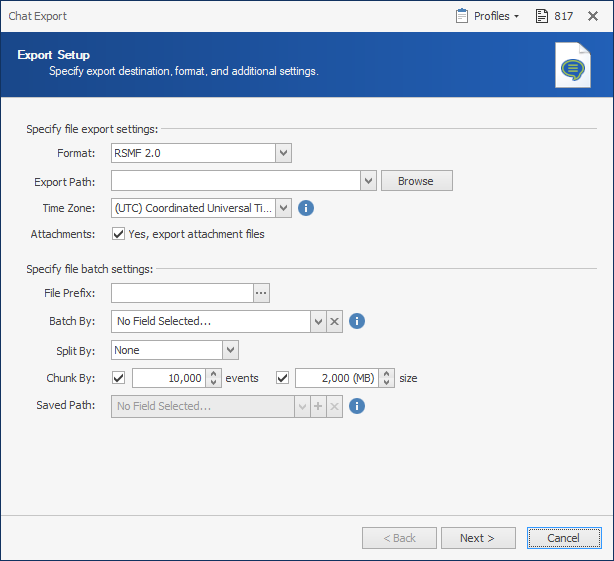
Specify file export settings section
Note: The selected Time Zone is used for any batching by date operations.
Note: Attachments that can't be embedded are not exported as loose files.
Specify file batch settings You can choose an (optional) batching strategy, which allows you to force conversations into their own RSMF file set. For example, you may want to batch on Custodian, Phone Owner, or Conversation/Thread ID. Since multiple conversations can exist in a single RSMF file, if you batch on Conversation or Thread ID, you can require exactly one conversation per RSMF file instead.
Note: Relativity recommends that an RSMF file should have no more than 10,000 events, so use batch settings that create files within these guidelines.
Note: The default values are set to match Relativity's requirements.
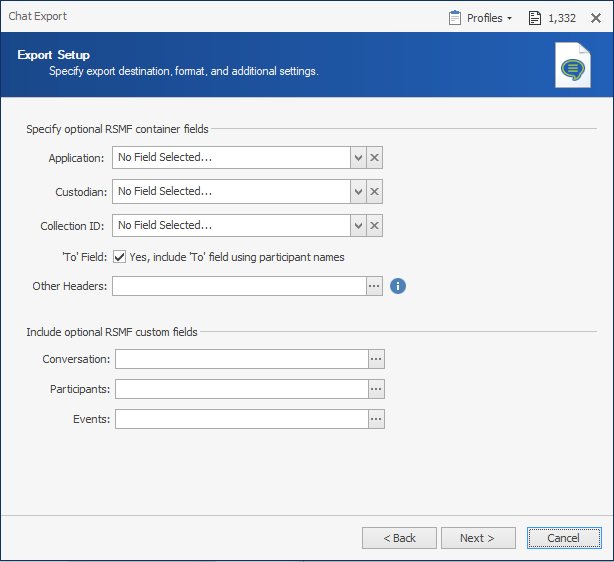
Specify optional RSMF container settings
'To' Field: Select to include 'To' field using participants names.
Other Headers: Click  and use the Select Fields dialog box to choose additional headers for the RSMF file. These are prefixed
 X-RMSF and can be mapped in Relativity processing. (For more information, please see the Header section of The Relativity Short Message Format.)
Include optional RSMF custom fields
Note: For more information on the required Chat fields and recommended content, please see Mapping Chat Fields.
If no default value appears in the Source Field, you can add a dynamic field.
HTML files requires the same fields to be mapped, as well as the Message Direction field.
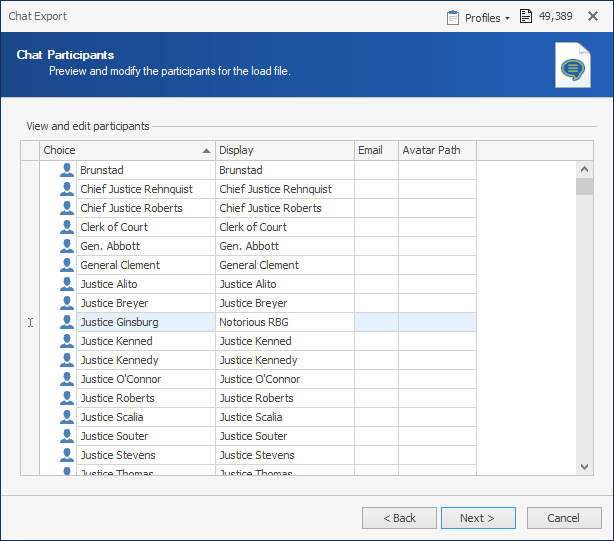
In the above example, the Choice value for Justice Ginsburg is set a new Display name for Notorious RBG (which would be saved into each RSMF file created with her name).
Note: If warnings exist, the Warnings icon ![]() displays the number of instances. Click to view the Event Log for details.
displays the number of instances. Click to view the Event Log for details.
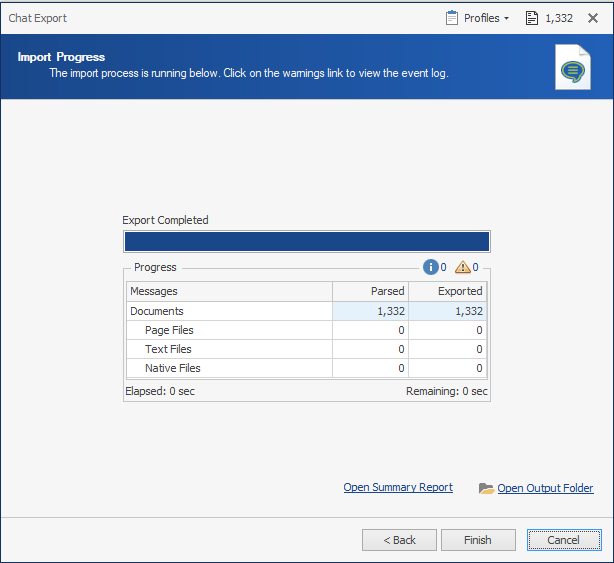
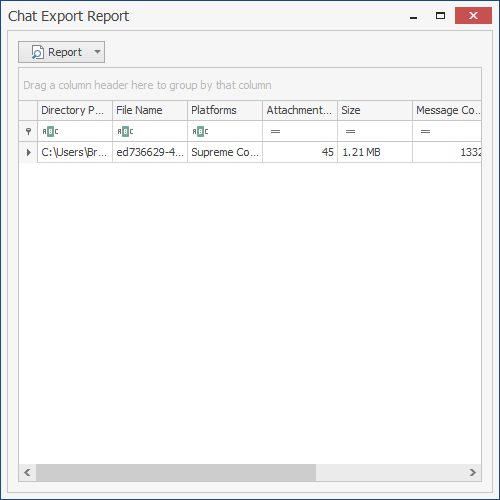
To view the Chat Export Report, click Open Summary Report.
To view the output folder directory, click Open Output Folder.
Example RSMF Export folder directory hierarchy
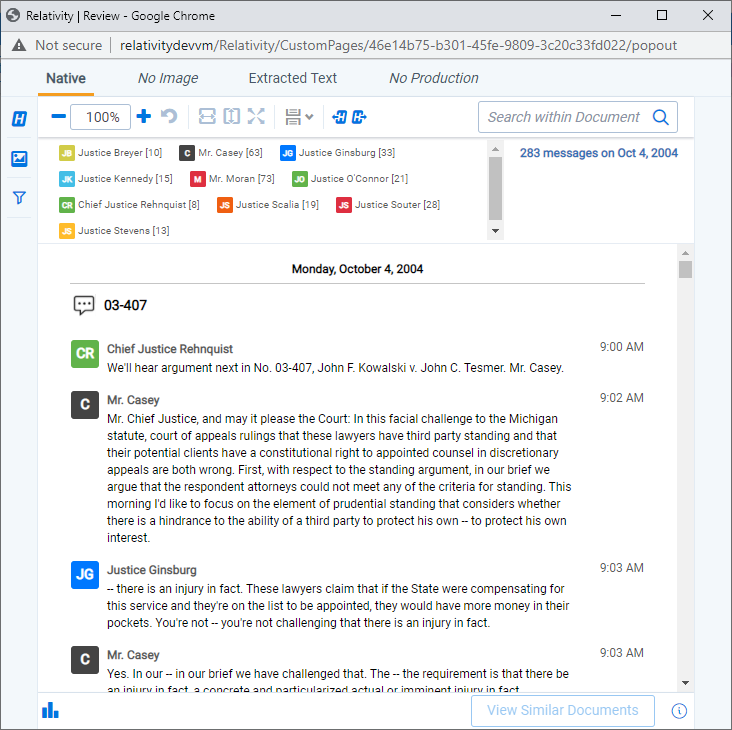
After exporting, the data set can be viewed in Relativity.