Chat Project
ReadySuite can collect and convert chat messaging data from platforms such as Microsoft Teams, Google Chat, and Slack to the Relativity Short Message (RSMF) file format. After the source data is loaded into a ReadySuite chat project, you’ll have the same options already available with our chat export tool. This includes the ability to batch, split by time, and re-export into RSMF and/or HTML files. Chat projects can also utilize ReadySuite’s scripting capabilities for advanced data normalization and manipulation.
Note: Please see Known Limitations for features that may not be supported based on chat platforms.
To create a chat project
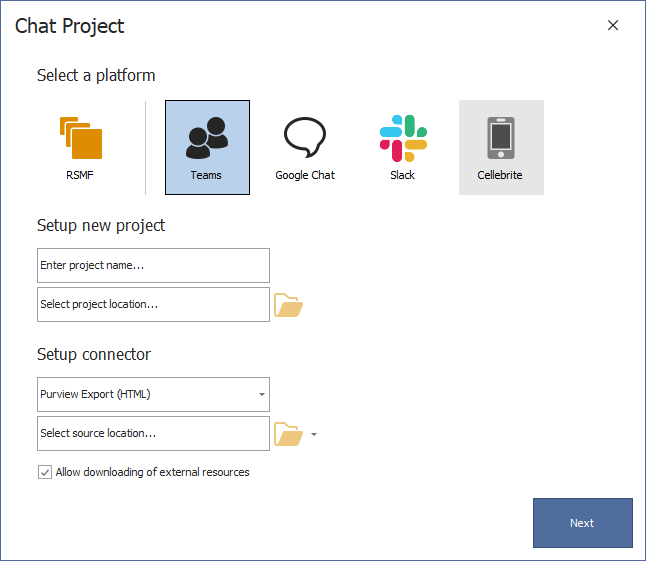
- On the Welcome page's New Project section, click Chat.
- In the Select Platform section, select the type of chat platform you want to collect or convert data from. Each platform has a different connector type.
- RSMF: Select to work with existing RSMF files.
- Teams: Select to use HTML, PST, or MSG files from Purview or connect to Teams using the Microsoft Graph API.
- Google Chat: Select to use a Google Chat Takeout request or an MBOX file from Google Vault.
- Slack: Select to use eDiscovery JSON files or connect to Slack via the Slack API
- Celebrite: (coming soon)
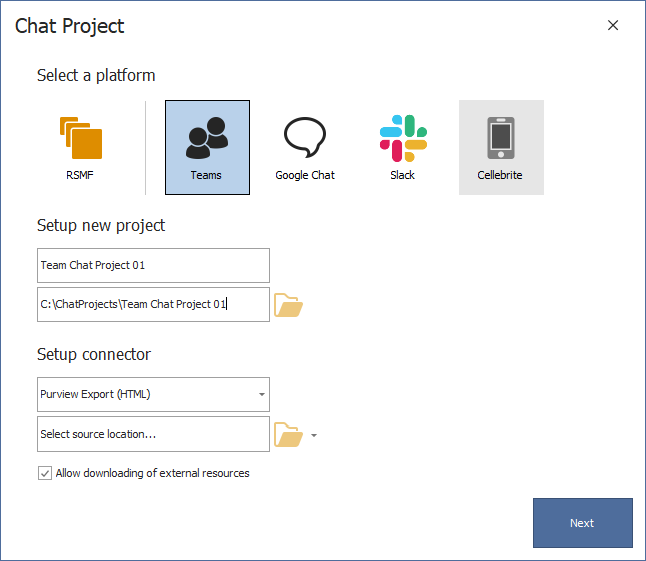
- In the Setup new project section, complete the Enter project name... box with the name of the chat project.
- Use the default project location or click the folder icon to open the Browse For Folder dialog box and complete Select project location... with a different location of the chat project. The project folder stores and/or caches data related to the chat project.
- Teams: Select from the following:
- Direct (MS Graph API): Select to connect to the Microsoft Teams environment to collect the data. Click the gear icon and use the Connector Credentials dialog box to enter the Client Id, Client Secret, and Tenant Id, then click OK.
- Purview Export (PST): Select to package messages and their attachments from Microsoft Purview into PSTs where possible. (If selected, Create .PSTs for messages where possible must be selected in the Export format section when setting up Purview Chat Connectors). Click the folder icon and select the source location of the three zip files. (If eDiscovery Standard was used for export, select the source location of the collection of loose files.)
- Purview Export (MSG): Select to package messages as .msg files and their attachments are not extracted. (If selected, Create .PSTs for messages where possible must be selected in the Export format section when setting up Purview Chat Connectors). Click the folder icon and select the source location of the three zip files. (If eDiscovery Standard was used for export, select the source location of the collection of loose files.)
- Purview Export (HTML): Select to convert data from Microsoft Purview into RSMF. Click the folder icon and select the source location of the Purview export in HTML format. (This option is only applicable to legacy exports from eDiscovery Premium.) Click the folder icon and select the source location of the collection of loose files.
- Google Chat: Select from the following: using Vault API and exported Takeout files
- Takeout: Select to convert data from Google Chat Takeout into RSMF.
Click the folder icon drop list and select the source location of the Takeout export in HTML format from the following: - Select a source folder path.
- Select a source ZIP file: Opens the Browse for file dialog box.
- Direct (Vault API): Select to connect to the Slack environment to collect the data. Click the gear icon and use the Set environments dialog box to enter the Client Id and Teams Id, then click OK.
- Slack: Select from the following:
- eDiscovery Export (JSON): Select to convert data from Slack eDiscovery Export into RSMF. Click the folder icon and select the source location of the Slack export in HTML format.
- Direct (Slack API): Select to connect to the Slack environment to collect the data. Click the gear icon and use the Set environments dialog box to enter the Client Id and Teams Id, then click OK.
- Celebrite: (coming feature)
-
Select Allow downloading of external resources to enable automatic downloading of external messages (such as avatars, images attachments, and inline media in messages). If cleared, such items are skipped. Chat projects may import into ReadySuite faster, but images that would otherwise be rendered in the chat viewer will only be preserved as the original URL or link to the media.
- Click Next.
- On the Participant Filtering page, select from the following:
-
All Participants: Select to include all participants in the chat.
-
Selected Participants: Select to choose which participants in the conversation are included in the chat project. When filtering by participants, if a selected participant had a conversation with an unselected participant, the unselected participant will appear only in the conversations involving the selected participant.
- Click Next.
- On the Date Filtering page, select from the following:
-
Any date: Select to include all conversations in the chat project regardless of when they occurred.
-
Specific date: Select the Sent on date to limit the chat project to only conversations that occurred on the selected date.
-
Within date range: Select the Sent on or after date and the Sent on or before date to limit the chat project to only conversations that occurred within the selected date range.
- Click Next
- View the Date retrieved status as ReadySuite either downloads or converts the chat data and preserves it in the RMSF format.
- When the data is 100% loaded, click Next.
- On the Conversation Filtering page, select from the following:
-
All Conversations: Select to include all converstations in the chat project.
-
Selected Conversations: Select to choose which conversations are included in the chat project.
-
Click Create.
Note: The default project location is defined on the ReadySuite Options dialog box on the General tab in the Project Directory drop list.
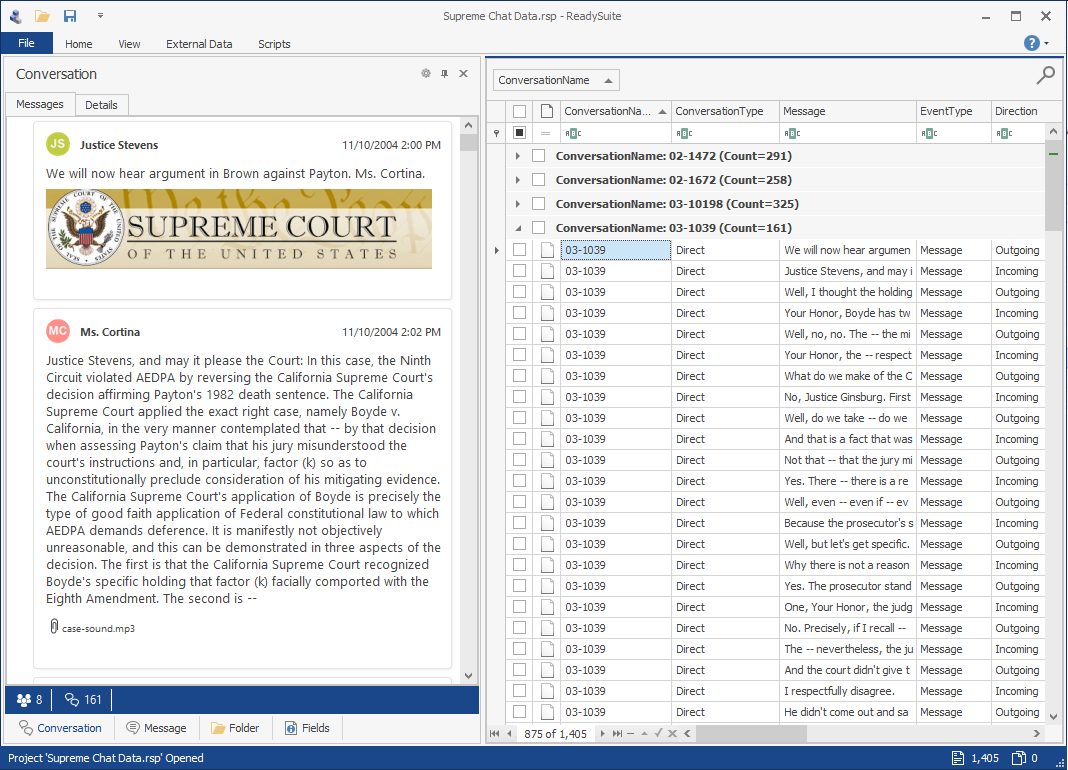
The imported chat files are listed in a Document Grid View with a modified ribbon (updated View and External Data tabs and removed Process tab). ReadySuite creates fields based on the data that was retrieved.
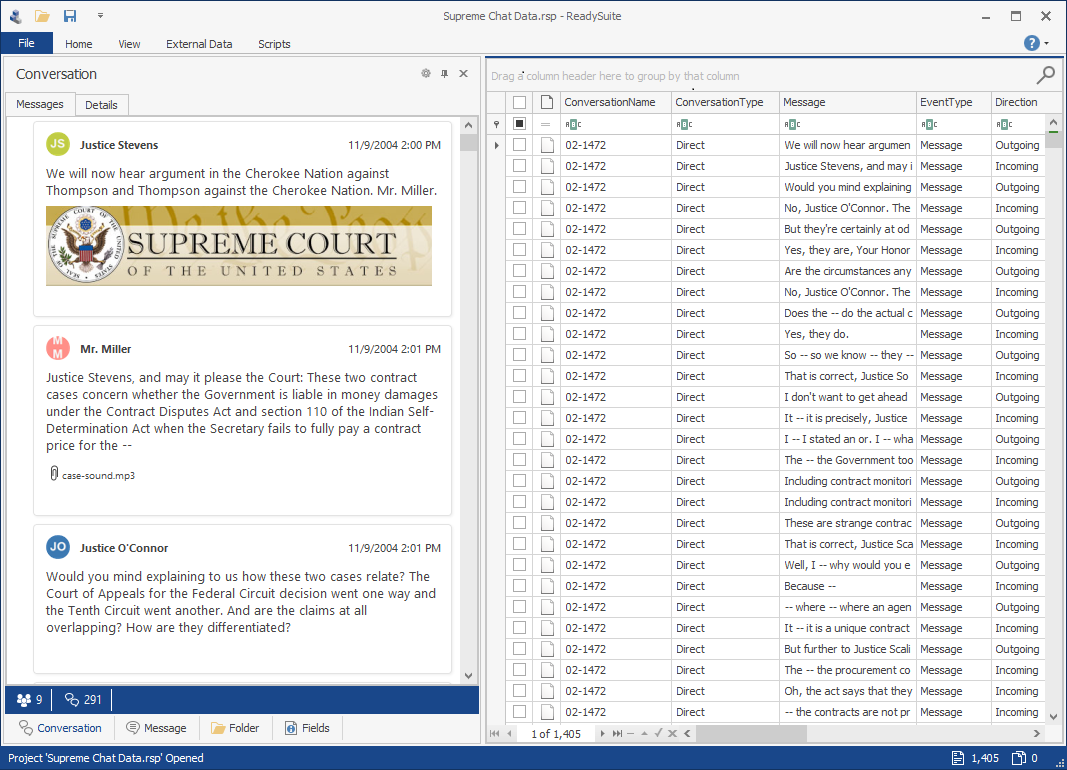
After you have created and loaded data into a chat project, you can use the existing Document Grid View and Folder View, along with the new Conversation Viewer, to explore the chat data.
You can continue to leverage many of ReadySuite’s existing features for chat data, such as our batch edit, grid filtering and sorting, and overlaying other load files into your project.
ReadySuite creates dynamic, platform specific fields (such as Conversation and Event fields) based on the data that was retrieved.
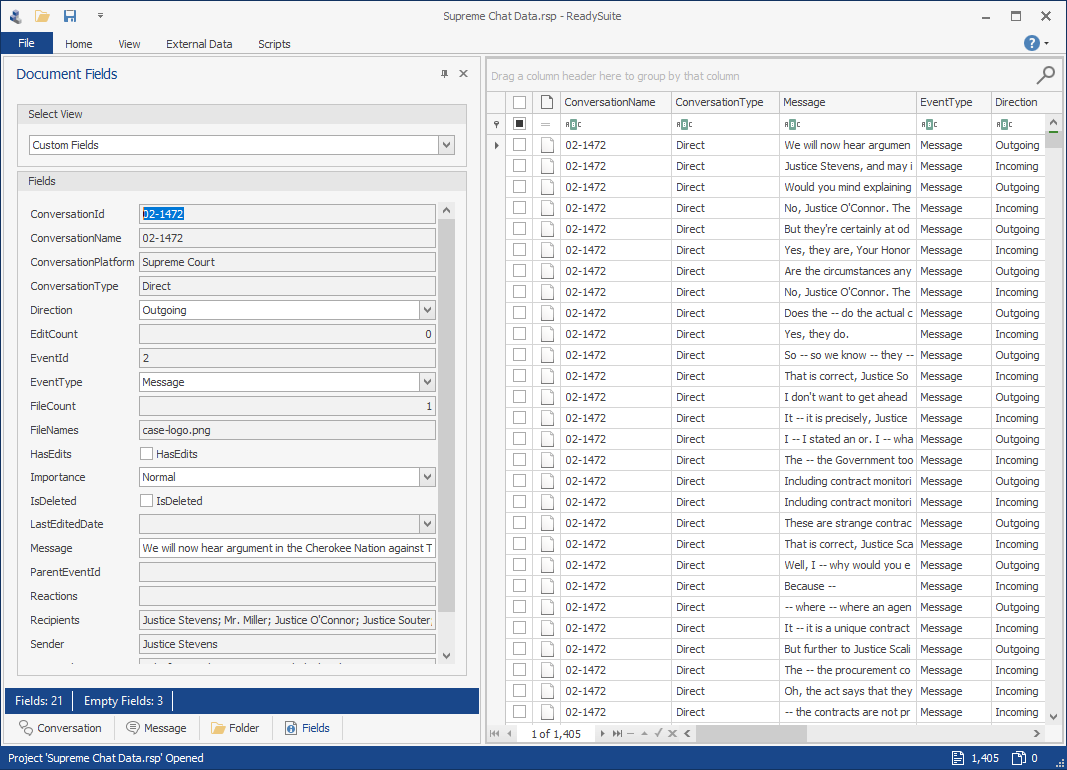
Some will be locked (cannot be edited) by default.
To easily view the conversations, consider grouping the data by Conversation Name or Conversation Id. Grouping by Conversation Type enables you to quickly identify which conversations are Direct and which are Channel.